
 This is what I have be
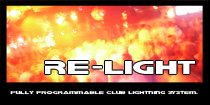
en working on for the last couple of weeks. The idea behind it is not completely original, I have seen something similar on the grid but it supported just a simple "light on" and "light off" command. I liked that system very much back then, anyway, but the high price kinda put me back, considering I was going to buy it just "for fun" and not for a real use.
That's why I decided to give it a go, with all the experience I recently built up working with lights and stuff.
Honestly I didn't quite figure out how much of a colossal work (at least for a LSL noob like me) I was putting myself in, but day after the day it shaped out kinda nicely.

So what is this all about? Basically, the system is meant to mimic the work of a real Light Jockey console like the ones you see in real clubs, in a way that let an operator switch predefined (and fully customizable) "programs" allowing him to move light sources along a certain path, at a certain speed (specifiable for each waypoint), with a certain color, and also specifying if the emitter should pulse on/off and at which speed. It sounds complicated uh? Well, to some extent, the notecard used to configure all this would kinda put off anyone not feeling expert enough, but worry not, I will write a nice manual for it. Anyway here's a sample program directly from the *Programs notecard:

PROGRAMNAME name of your program
emitter 1:<1,>:0:<5,>:1:<5,>:0.7:<-5, -5, 6>:0.4:<-5, 5, 0>:0.9
emitter 2:<0,>:0.8:<3,>:1:<2,>:0.5:<4,>:1.3:<5,>:3.1
emitter 3:<0,>:0:<1,>:1:<2,>:0.9:<-2, 5, 10>:1.9:<1,>:2
Ok now most of you already closed your browser or pointed it somewhere else, but for the few who are reading still, a brief explanation.
Each program starts with a PROGRAMNAME declaration, followed by the name of the program, "name of your program" in this example.
Then, one line for each light emitter you want to use in your program. The parameters in these lines are separated by semi colons. Here's the syntax:
- emitter name (ex. "emitter 1");
- light RGB color, in the usual SL vector format;
- the "pulsing speed" of the emitter. Pulse as, the speed at which the light should blink on and off for added scenic results. If you don't want your emitter to blink at all, just put "0" as value;
- waypoints! this is the hard part, each waypoint is made up of two parameters, first is a the position of the emitter, relative to the main unit, expressed in the SL position vector format. The second parameter is the number of seconds, expressed as a float number, which the emitter should spend in this waypoint. In the example above, "emitter 1" spends 1 seconds at position <5,>, 0.7 seconds at position <5,>, 0.4 seconds at position <-5, -5, 6> and 0.9 seconds at position <-5, 5, 0>.
Remember that this position is relative to the main unit position, this to make things easier and allow emitters to be rezzed correctly as you use them in any place you like.
 I am sure this looks still way complicated for many of you, that's why I the system, a "rez. marker" option that will rez a red shiny ball on top added another feature toof the main unit, announcing its xyz position relative to the main unit as you touch it. Practically, what do you do to quickly make a program?
First of all, you decide your program name (it will be used in the main unit menu for selection purpose), how many emitters you want, their name (will be used to tweak single emitter options in a soon-to-come "manual mode"), their color and if you want them to pulse or not, and at which speed. This will cover the first 3 parameters of your configuration. Then, the fun of waypoints part start. Rez your "marker", and start moving it around (right click on it, and select Edit from the pie menu, then Move and drag the xyz movement arrows around). Once you get it in a good position for your waypoint to be, close the Build panel, left-click on your marker and note down

 the xyz position it announces. If you want, you can simplify these values, for example, a value of 50.5421 can be written as 50.5 without many problems :p This is your first waypoint, repeat these steps for as many waypoints as you want your emitter to run, deciding how much time you want it to spend in each of them, as explained earlier.
And then, repeat all this for as many emitters as you choose to have, remembering SL fails to render correctly more than 8 (I think) hardware lights on your screen.
Still hard? Well ok just drop me a line and I'll see about it, but I really can't get it easier than this, I understand it might look like hard stuff, but I can assure you that with 10 minutes of work you can get awesome programs to use for your special clubbing needs ;)
 About release time, well I can say "soon, very soon". I am currently tweaking a bit the rezzing system, to make it totally fail proof, but that shouldn't take me more than a couple of days at most, then I'll release it to the few beta testers I got myself, and if it's all good, it'll pop on my shop! So just be patient :p
No comments:
Post a Comment